
Packaging Guides
Inside the Line: How BOPP Tape Is Actually Made
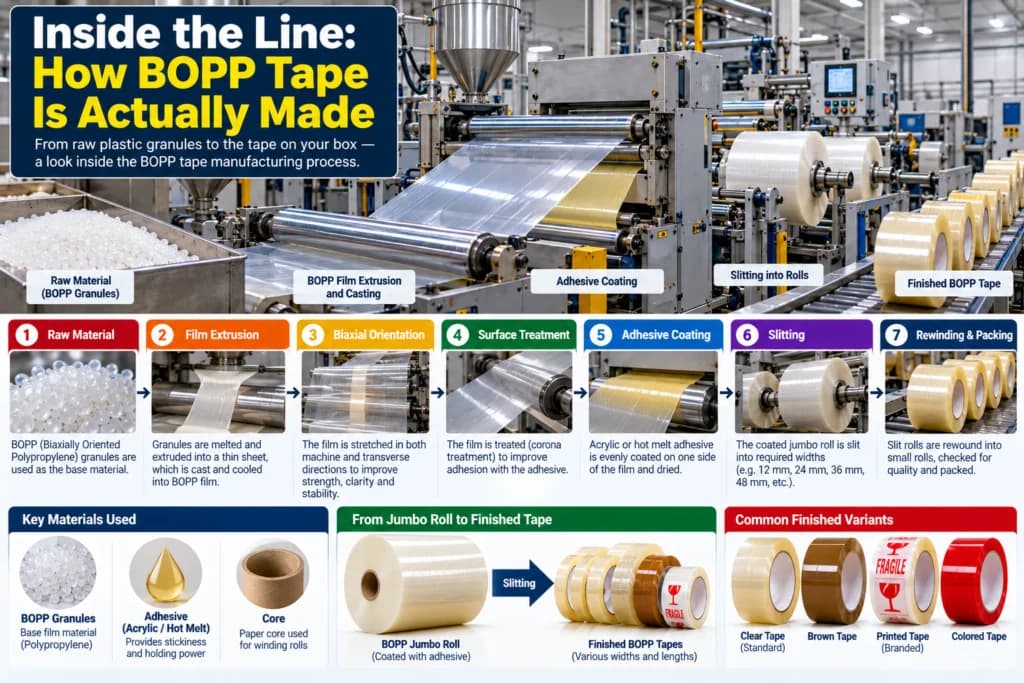
Most buyers only ever see the finished roll. It shows up, it seals cartons, and nobody thinks much about what happened before it reached the warehouse. But if you want to understand why one roll holds and another peels off at the flap, it helps to know what actually happens on the line. Here is the process, start to finish, the way we run it at our Mundka facility.
Step 1: The base film
Everything starts with BOPP film, biaxially oriented polypropylene, bought in large jumbo reels. This film is the backbone of the tape. It is not manufactured in-house, it comes pre-stretched and oriented from film producers, in specific thicknesses measured in microns. We stock film across the 35 to 65+ micron range, because the end use decides which thickness makes sense. Light e-commerce parcels do not need the same film as export cartons sitting in a container for six weeks.
The film arrives clear or can be tinted, depending on whether the final product is plain, brown, or coloured tape. At this stage it is just raw material, no adhesive, no print, nothing that makes it usable as a sealing tape yet.
Step 2: Coating the adhesive
This is where the film becomes tape. The jumbo film reel is loaded onto a coating line, and a water-based acrylic adhesive is applied evenly across one side. We use water-based acrylic because it gives consistent tack without the odour and solvent handling issues of solvent-based systems, and it performs reliably across the temperature ranges most Indian warehouses and transit routes see.
Coating thickness and adhesive loading are controlled closely here. Too little adhesive and the tape will not grip the carton properly, especially on recycled corrugate with a rough surface. Too much and you get adhesive ooze at the edges, which picks up dust and looks messy on the roll. After coating, the film passes through a drying and curing section before it is wound back into a large coated jumbo roll.
At this point you have what we call a mother roll, or jumbo roll, typically in widths from 192mm up to 1320mm. This is the intermediate product. Nothing is usable for carton sealing yet, it still needs to be printed if required, and it needs to be slit down to usable widths.
Step 3: Printing, if the order needs it
If the order is plain or brown tape, this step is skipped. If it is custom printed tape, the coated jumbo roll goes through rotogravure printing before slitting.
Rotogravure uses engraved cylinders, one per colour, to transfer ink onto the film surface. We can run up to three colours in a single pass. The cylinders are made specific to the artwork, so changing a logo or design means a new cylinder, which is part of why printed tape has a longer lead time and higher minimum order quantity than plain tape. Once a cylinder exists for a repeat order, though, reprints are quicker.
Print needs to be applied evenly and needs to dry fully before the roll moves to slitting. Ink that is not cured properly can smudge or transfer onto the adhesive side when the roll is wound tight, which ruins the batch. This is one of the reasons printed tape production needs tighter process control than plain tape.
Step 4: Slitting to final width
A jumbo roll at 1320mm width is not something any carton sealing operation can use directly. It has to be slit down into the standard tape widths that actually go onto a dispenser gun or a carton sealing machine, commonly in the 24mm to 72mm range depending on the customer.
Slitting is done on precision slitting machines that cut the wide roll into multiple narrow rolls simultaneously. This step decides a lot about the finished tape’s usability. Clean, straight edges mean the tape unwinds smoothly and does not fray or curl at the sides. Uneven slitting shows up later as tape that will not track straight through a dispenser, or edges that lift after the carton is sealed.
Slitting also determines roll length. Standard lengths are set based on the core size and the outer diameter required, and this is where consistency matters for anyone running automated sealing lines, since inconsistent roll length means more downtime for reel changes.
Step 5: Core winding and final rolls
Each slit tape roll needs a paper core to wind onto. We make our own paper cores and tubes in-house rather than buying them in, which gives control over inner diameter and core strength. This matters more than it sounds. A core that is slightly out of spec can jam on an automatic dispenser or a carton sealing machine, which stops a packing line cold.
The slit film is wound onto the core at controlled tension. Too loose and the roll telescopes in transit, with layers sliding sideways. Too tight and unwind becomes difficult, which shows up as tape tearing instead of peeling cleanly off the roll. Getting tension right is as much about the operator’s feel for the line as it is about machine settings.
Step 6: Inspection and packing
Finished rolls are checked for adhesion, unwind consistency, and visual defects before packing. Rolls are boxed for dispatch, whether that is mini jumbo rolls going to a slitting house for further processing, or finished narrow rolls going straight to an e-commerce fulfilment centre or FMCG plant.
Why this process matters to a buyer
None of these steps work in isolation. A good adhesive on badly slit film still gives you a tape that will not unwind straight. Good slitting on under-cured print still gives you ink transfer problems. The reason we run coating, printing, slitting, and core winding all under one roof at our Mundka facility is that it lets us control each handoff, instead of relying on multiple vendors with their own tolerances and schedules. When something goes wrong with a batch, we know exactly which stage to check, because we ran all of them ourselves.
Your product, our package
Send us your requirement
Widths, colours, artwork, monthly volume: share what you need and we will come back with a price and a date.