
Packaging Guides
Inside a BOPP Tape Line: From Film to Finished Roll
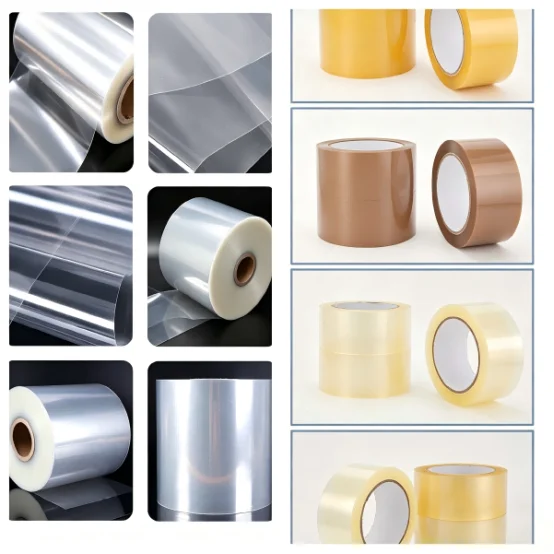
Most people who buy tape never see how it is made. They see a roll, a core, a price per piece. But the process behind that roll decides how well it sticks, how evenly it unwinds, and whether it holds up on a courier belt or in a container for six weeks at sea. Here is how it actually happens, step by step, on a line like ours in Mundka.
Step 1: The base film
Everything starts with BOPP film, biaxially oriented polypropylene. This comes in as large parent rolls, already stretched in two directions during film manufacturing to give it strength and clarity. We do not make the film ourselves, we buy it in, but the quality of this film sets the ceiling for everything downstream. Thickness here is measured in microns, and this is where the final tape’s micron range starts to take shape, whether it ends up 35-40 micron for light parcels or 65+ for export cartons that get handled repeatedly.
Step 2: Coating with adhesive
The film is unwound onto a coating line where a thin, even layer of adhesive is applied. We use water-based acrylic adhesive, applied through a coating head that controls exactly how much goes down across the full width of the film. Too little and the tape won’t grip the carton, too much and it turns messy, leaves residue, or bleeds out the sides of the roll.
After coating, the film runs through a drying oven. This is not optional and it cannot be rushed. The water in the adhesive has to evaporate fully, or the tape will smell, feel tacky in the wrong way, or lose adhesion over time. Line speed, oven temperature and adhesive formulation all have to match up here. Run it too fast and the coating is still wet underneath a dry-looking surface, which shows up later as poor stick or a hazy film.
Once coated and dried, the film goes onto a large winder and comes off as a coated jumbo roll, often called a mother roll. At this stage it is one continuous roll, usually well over a metre wide, with adhesive on one side and nothing printed on it yet.
Step 3: Printing, if the order needs it
Plain and brown tape skip this step and go straight to slitting. But for custom printed tape, the jumbo roll moves to rotogravure printing before slitting happens.
Rotogravure uses engraved cylinders, one per colour, up to three colours in our setup. Each cylinder is etched with the design and picks up ink from a reservoir, then transfers it onto the film as it passes through. The film runs at speed, so the cylinders, ink viscosity, and drying between colour stations all have to be tuned together. Too much ink and it smudges or takes too long to dry, too little and the print looks patchy or fades against the film.
This is also where colour consistency gets tested. A logo or brand colour has to look the same on the tenth roll as it did on the first, and it has to hold up under changes in humidity and room temperature through the day. Printed jumbo rolls are checked for registration, meaning the colours and design line up correctly across the width, before they move on.
Step 4: Slitting into working widths
A jumbo roll, whether plain or printed, is still too wide to sell as tape. It needs to be cut down into narrower rolls, usually 24mm, 48mm, 72mm or other standard widths depending on the order.
The slitting machine holds the jumbo roll on a shaft and runs it against a set of rotating blades spaced exactly to the widths needed. This has to be precise. If the blades are even slightly off, the resulting rolls come out uneven, with wavy edges or inconsistent width from one roll to the next. That shows up later as poor unwind on a tape dispenser or sealing machine, which is one of the most common complaints buyers have with low-quality tape.
Slitting speed also matters. Run it too fast on a coated, printed film and the edges can tear or fray instead of cutting clean. A clean, straight edge is one of the easiest ways to tell a well-made roll from a rushed one, just by looking at it.
Step 5: Winding onto cores
After slitting, each narrow strip is wound onto a paper core, the cardboard tube at the centre of every roll. We wind our own cores in-house, which means we control the internal diameter and the firmness of the winding, both of which affect how the tape performs on automatic tape dispensers and sealing machines later.
Winding tension has to be even and consistent. Wound too loose, the roll goes soft and telescopes, meaning the layers slip sideways during transport. Wound too tight, and the tape can stretch slightly on the roll, which changes its adhesion characteristics before it is ever used. This step also determines the final roll length, commonly 65 metres or 100 metres depending on the order.
Step 6: Inspection and packing
Before rolls go out, they get checked for adhesion, unwind, roll firmness, and for printed orders, colour and print quality against the approved design. Rolls are then packed, usually in cartons of a set quantity, ready for dispatch to e-commerce warehouses, exporters, or distributors.
Why the whole process matters to a buyer
None of these steps work in isolation. A good adhesive coating means nothing if the slitting is uneven. Sharp printing means nothing if the winding tension is off and the roll won’t unwind smoothly on a packing line. When you are choosing a tape supplier, what you are really choosing is whether all six of these steps are handled consistently under one roof, or whether corners get cut somewhere in between. Doing coating, printing, slitting and core winding all at one facility is what lets us catch problems at each stage rather than finding out at the customer’s end.
Your product, our package
Send us your requirement
Widths, colours, artwork, monthly volume: share what you need and we will come back with a price and a date.